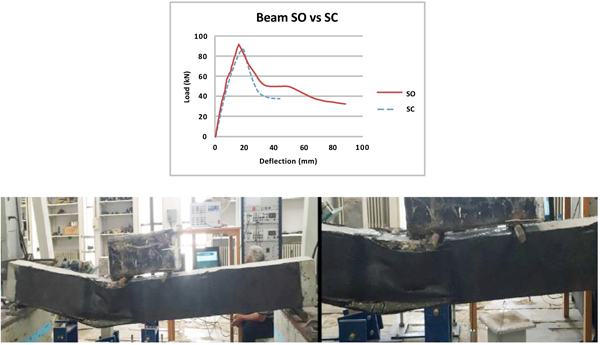
Fig. (9)
Load-mid span deflection curve of beam S-0 and its deformation after failure.