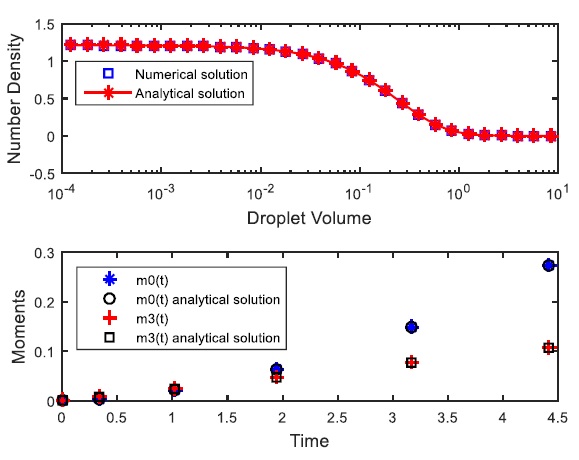
Fig. (3)
A comparison of numerical and analytical results in Case 3.