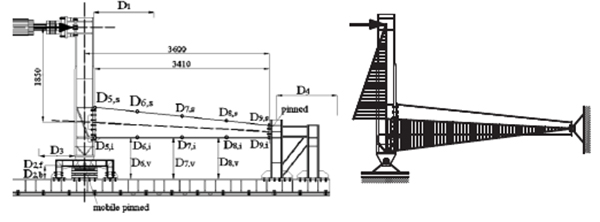
Fig. (4)
Testing setup and loading scheme (bending moment diagram) [5].