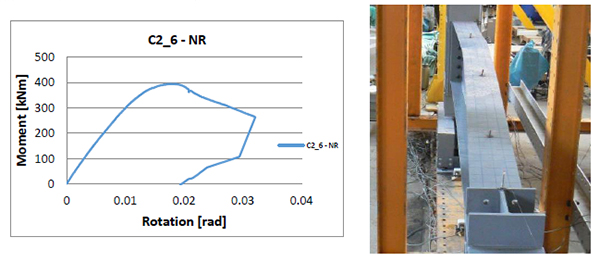
Fig. (8)
C2_6 Specimen behavior curve and failure mode.