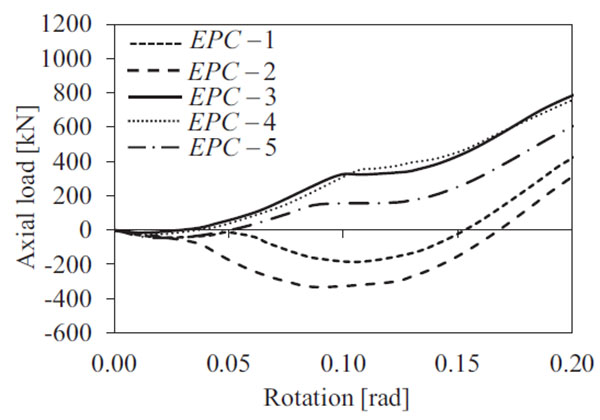
Fig. (9)
Axial load
vs
. joint rotation response curves.